Assignment Brief – Asset Design
In the Environment Design module you will have been given a main theme and a subtheme. Once you have decided on your themes, they will be used to influence your 3D asset creation to create a centre piece for your environment.
Main Themes:
- Horror
- Science Fiction
- Fantasy
- Historical
Sub-themes:
- Alien
- Corruption
- Utopia
- Dystopia
- Celebration
- Decay
- Family
- Beauty
Production piece expectations
You will be rewarded for a more detailed designed asset i.e. textured asset using substance painter, baked high to low poly, normal maps. You will also be rewarded if you are able to maintain sensible poly counts without sacrificing the design of the asset. Simple/basic assets will attract lower marks.
These guidelines are what we expect to see as a minimum within your 3D asset submissions:
- 4K Texture maps
- A unique design, heavily inspired by location and sub-theme
- Fully lit, textured beauty shots of your asset
- Unlit screenshots of your assets in wireframe, orthographic view
- A 20 second video render showcasing your asset
Additional content
For those who seek higher marks:
- Tri count less than 10k / Poly count less than 5k
- Low poly model with textures baked from a high poly model in substance painter
- Studio quality lighting setup
Theme and Asset Choice
Initially I was going to go for a more Sci-Fi Horror type asset leaning into the more corrupted and decaying look and style. However, I decided to pick the themes of Fantasy and Beauty as a way to challenge myself and pick something out of my usual comfort zone.
For the main asset idea, I started thinking from my environment, which would be a moonlit garden hidden away from a cabin by a covered pathway. From this I thought that a cool centrepiece for it within the theme would be a cute little tree forest spirit thing.
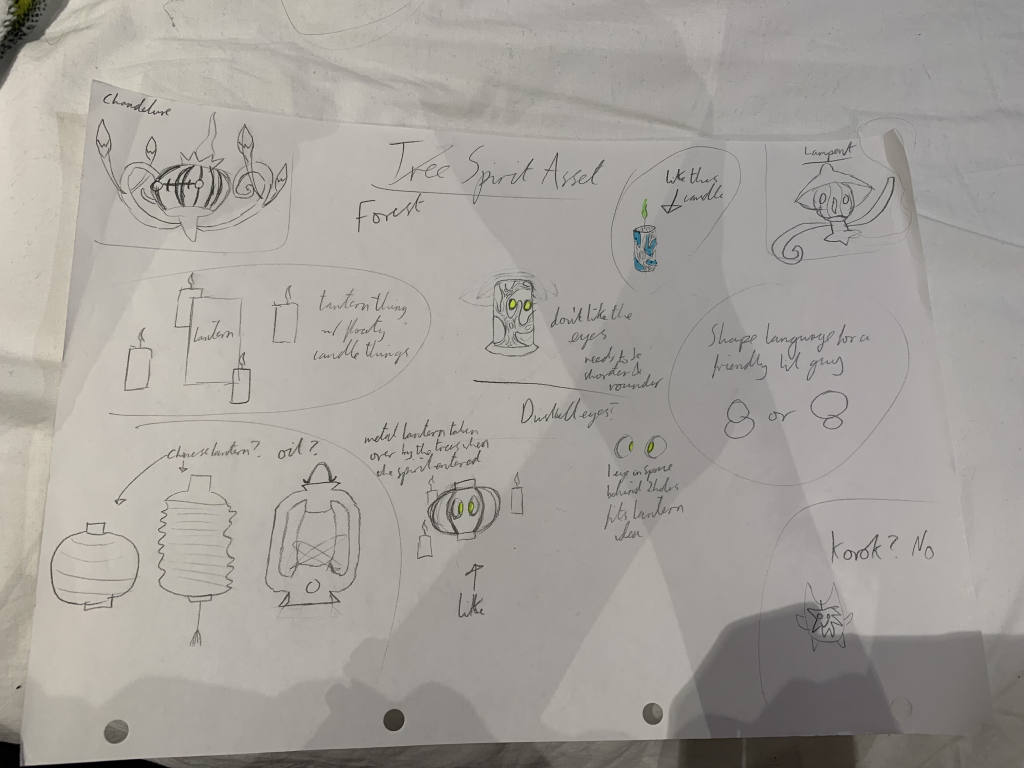
This sheet shows the process I took to get towards my final asset idea. I started by wanting to create something along the lines of a small lantern-y Pokémon type creature based on Chandelure with magic candles floating around them.


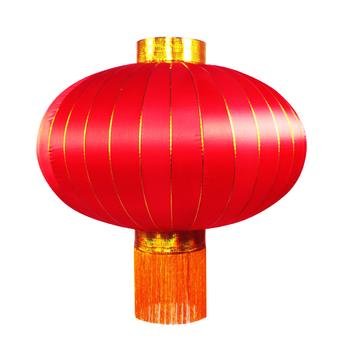
This then developed into a spirit living within a lantern more similar to Lampent. I looked through various types of lanterns, mainly looking at paper lanterns as they fit the look of a tree spirit in a garden better than the more industrial oil type lanterns.
I then did my first sketch, making a cylindrical lantern with bark growing over the sides to show that it had become overcome by nature almost. However, I couldn’t decide on a top for the lantern as a top similar to Lampent’s didn’t look right and no other shapes seemed to either. I also didn’t like the eyes or how straight all the edges were when, shape language wise, it needed to be rounder if it was to be looking cute and beautiful.
So for the second draft I discussed with others and briefly decided to try a different design than a lantern and create a more Korok inspired creature more like a little forest goblin. However, this didn’t get any further than discussion as I felt it strayed too far from my original concept as I wanted the floaty candle lantern creature before I solidly decided on it being a tree spirit.
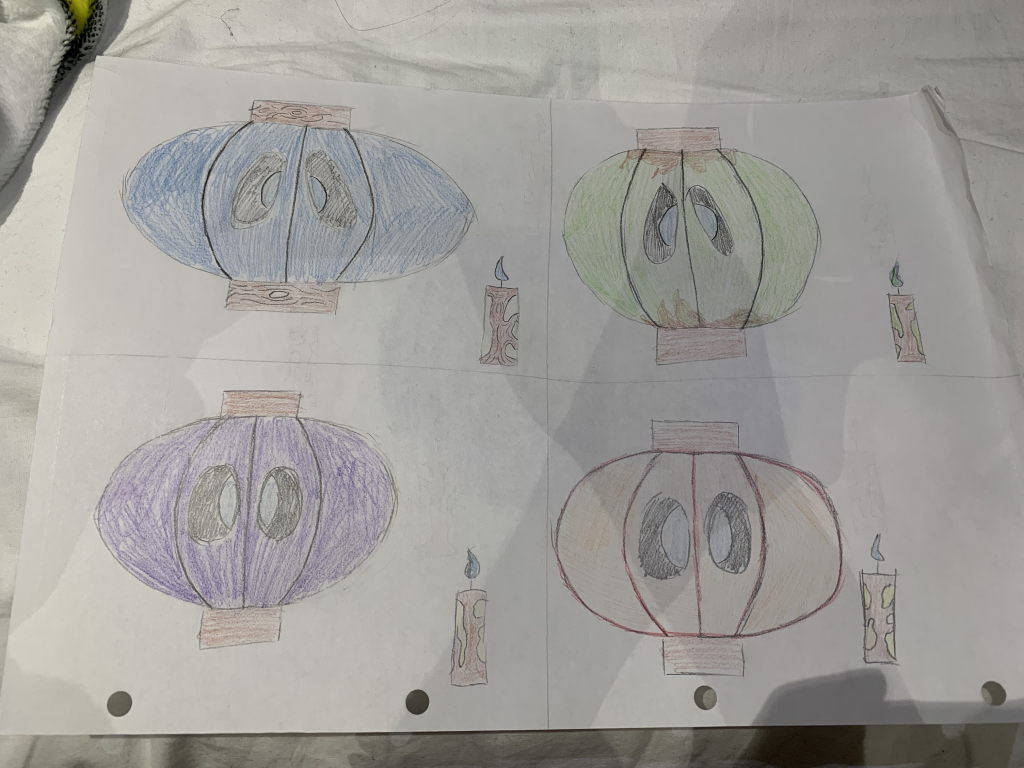
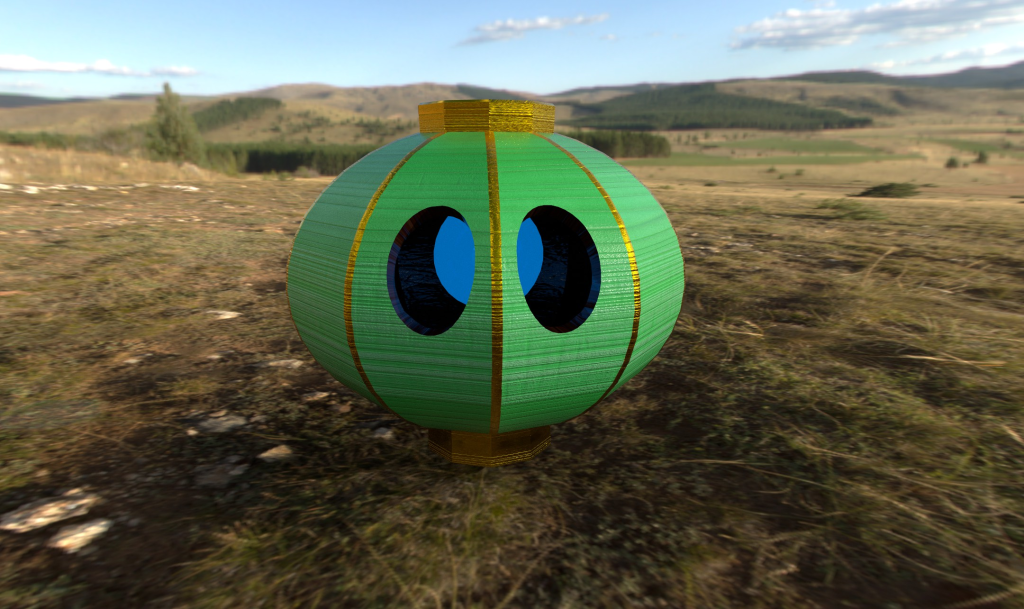
So I ended up using a rounder, more spherical lantern whilst also changing the eyes to some similar to that of Duskull, with the eyes being holes with a single glowing orb behind both, so instead of a candle, the lantern spirit had a glowing pupil.

I liked this part of the design in terms of its cuteness and how it worked with my theme and environment so I then moved onto the floaty candles. For these I started off with the flame being green to show the magic behind them but I later moved onto blue as I felt it was a nice friendly colour to match the eye of the lantern. After this I decided to have the candles be overgrown with bark, as in the ‘story’ of this creature its a spirit that has taken over these items and they have slowly been overtaken by the woodland because of it.
With the colour of the main lantern spirit, that wasn’t tied down until the asset was actually getting textured. However, I tried various colours and ideas in these sheets.
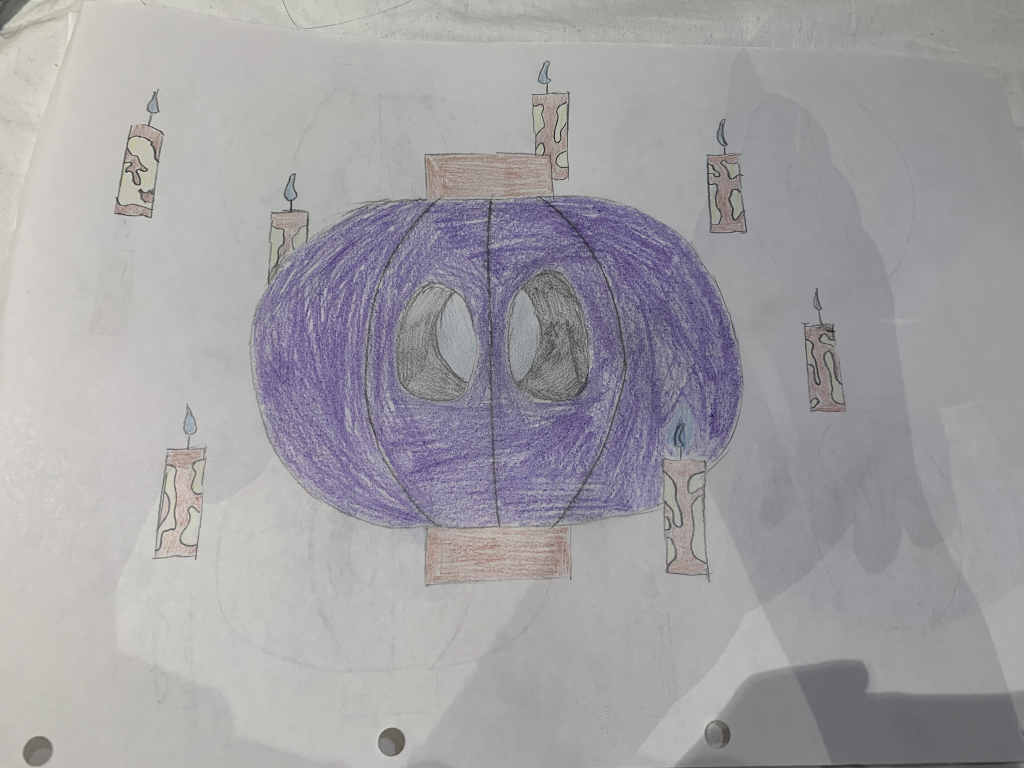
After this, I felt like the idea was solid enough that I could move onto modelling and work out any remaining kinks along the way.
The Asset’s Story
The story behind the asset is that a lost spirit wandering the forest came across an abandoned lantern and filler candles, and decided to use it as its new body. It slowly amalgamated the lantern and candle into itself until it became the new one with the eye holes, the singular pupil and the bark covered candles that float around and glow a mystical shade of blue as it wandered the forest before it settled in a moonlit garden.
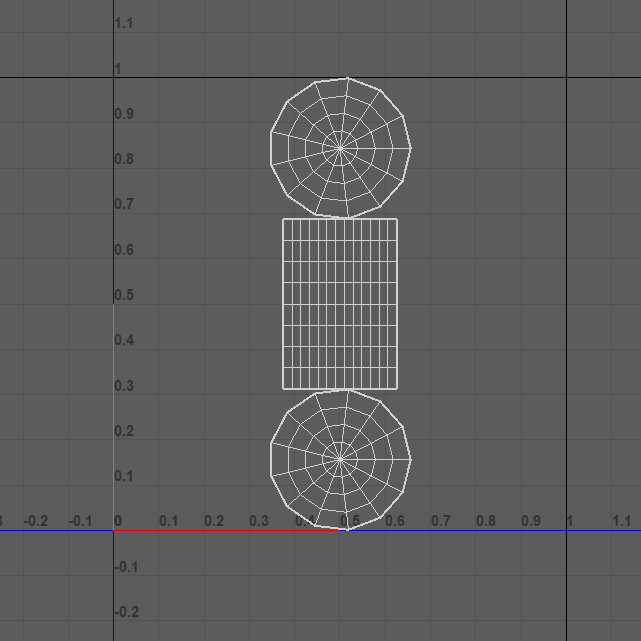
Modelling Process
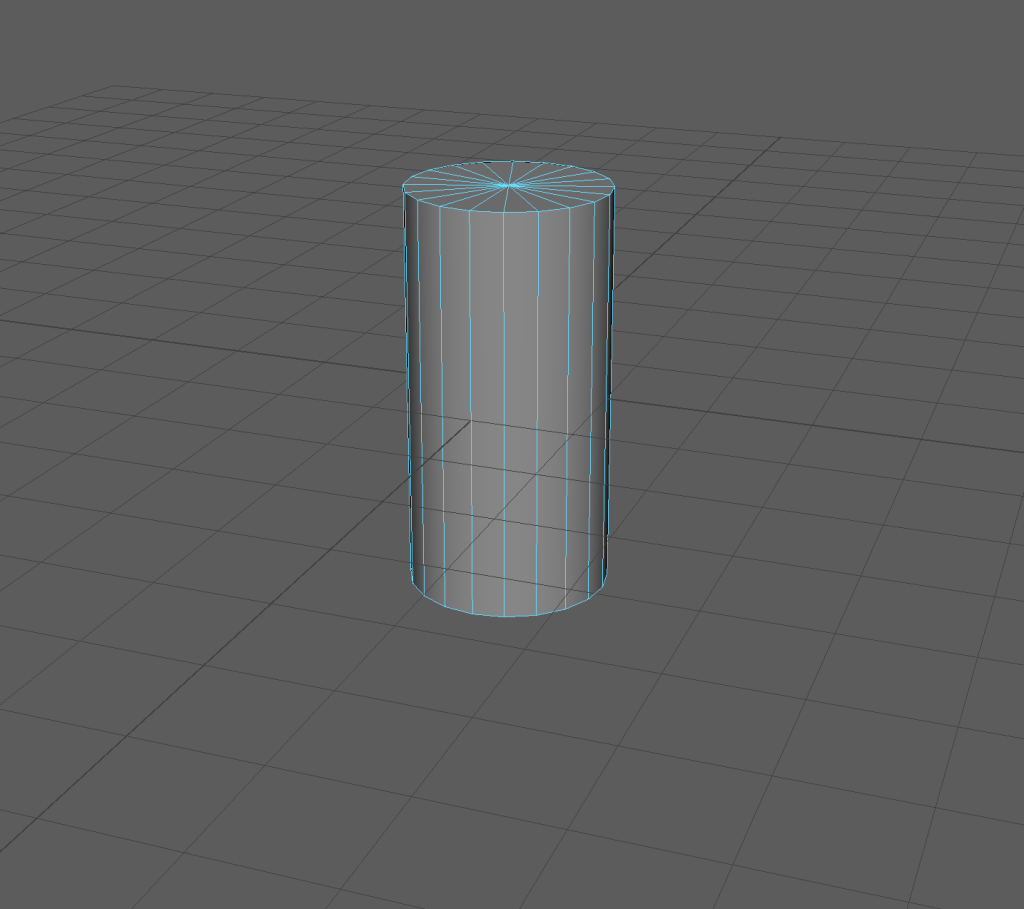
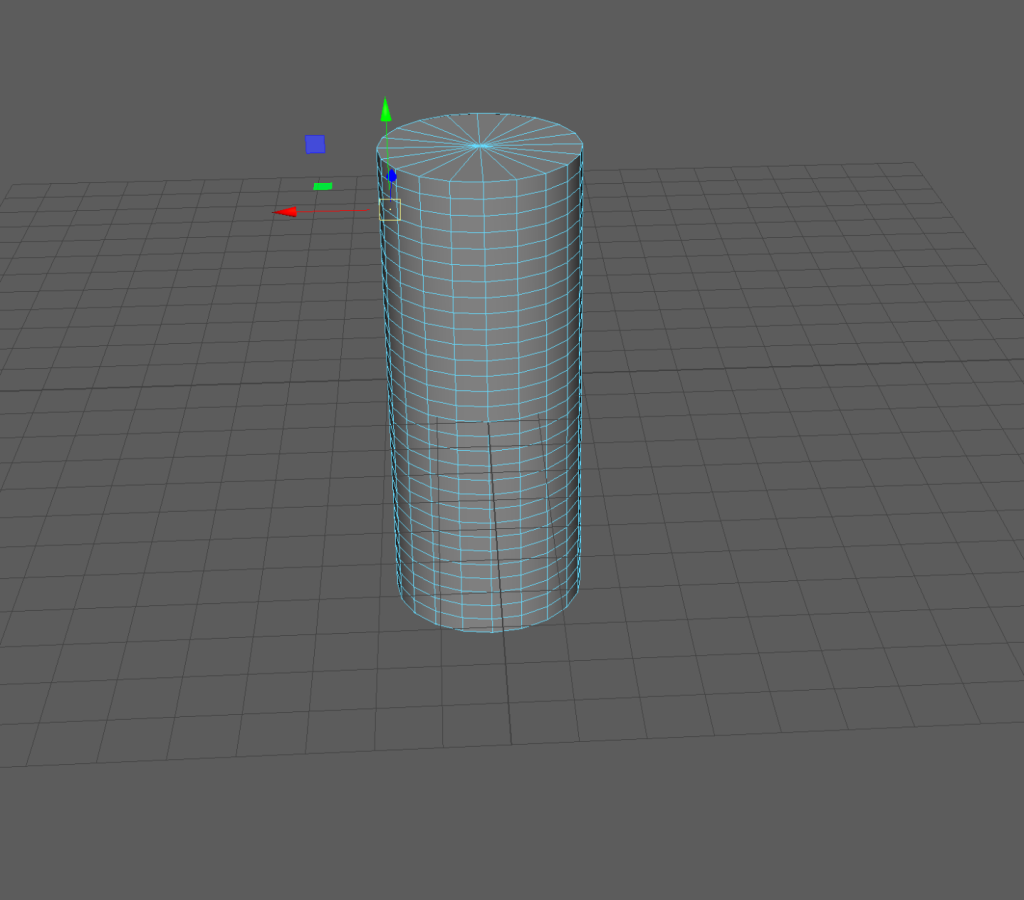
I started with a basic cylinder and, stretched it, and increased its polies to make the top/bottom bits of the lantern. I then removed the faces of the middle section as the centre had to be empty for the eye to work properly.
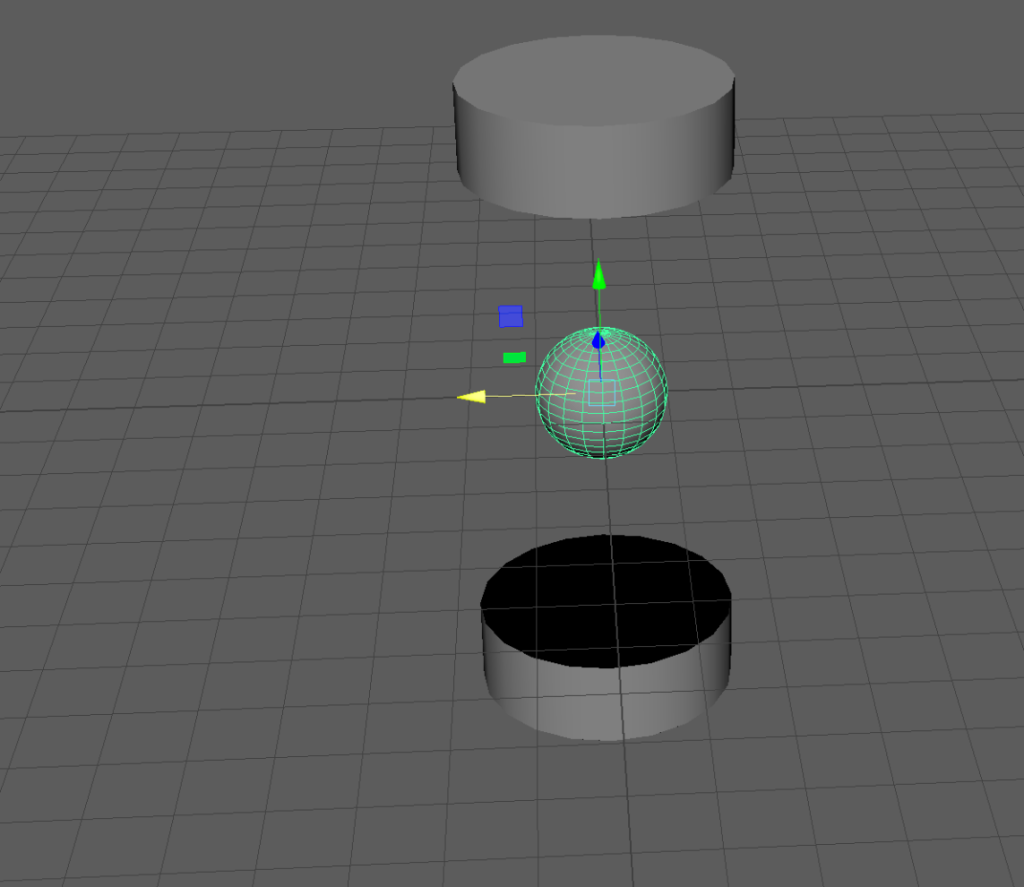

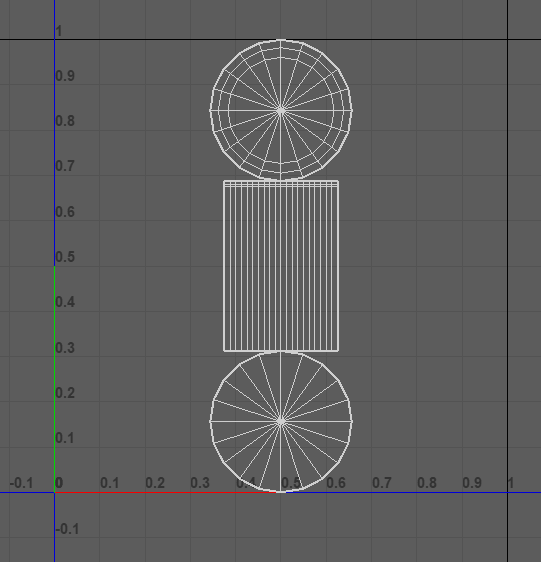
I then added a sphere and stretched it to the correct size that I was after. I then altered the poly count of it to give it the sharper edges that I wanted so that it would look more like a lantern, just with fewer edges so that the eyes worked better. I then added another sphere, shaped it and angled it to be the size I wanted for the eyes, before duplicating and positioning on the body.
At this stage I beveled the top and bottom to make it slightly smoother and reduced the polies of the eyes to keep the poly count down ready for the candles later.
I then highlighted the faces that the eyes went over and divided them using the Add Divisions function so that the ngons created by removing the eyes would be easier to manage. Next I used Boolean Union to join the main body to the top and bottom and used Boolean Difference to remove the eyes. Due to the poly difference between the top and bottom cylinder bits and the body, a pretty much unfixable ngon was created where if the top was fixed, then the faces around them would become ngons too. The case was similar around the eyes too, basically destroying the model as fixing it would take a significant amount of time and also skyrocket the poly count when I’d been trying to keep it under control. As this was pretty catastrophic and felt unsalvageable, I decided to start again with some ideas as to what to avoid doing to not repeat the last attempt.
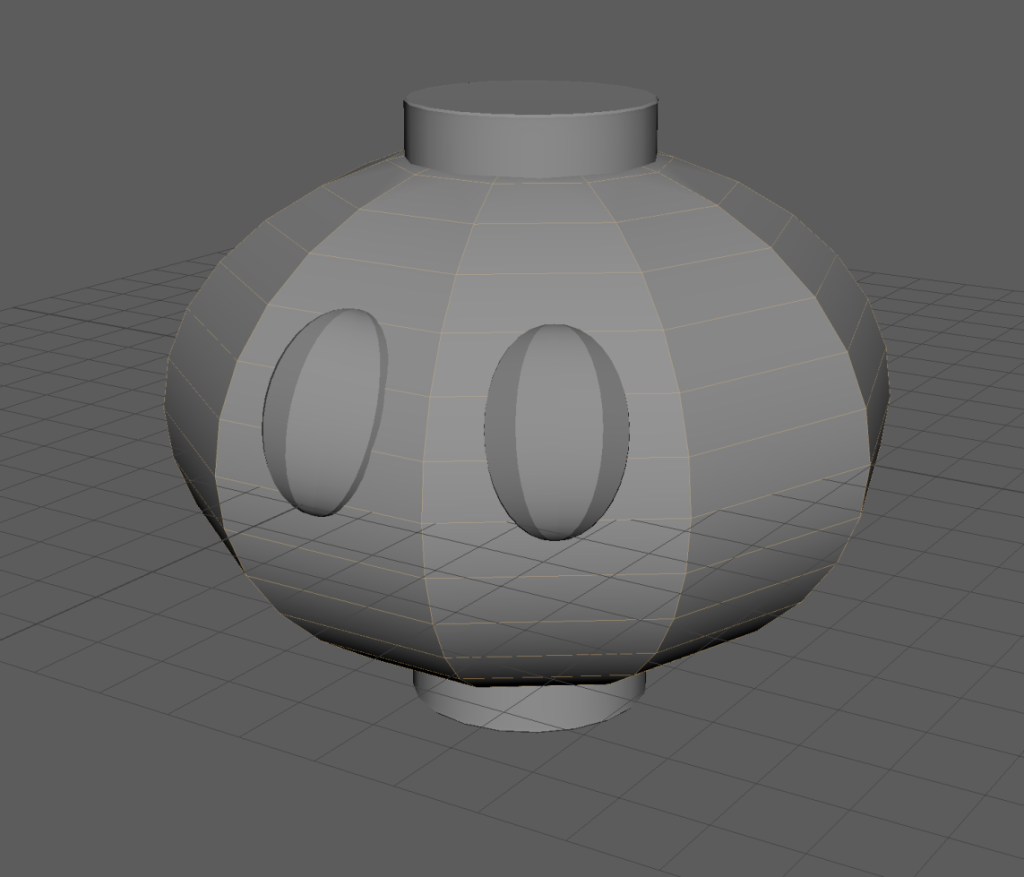
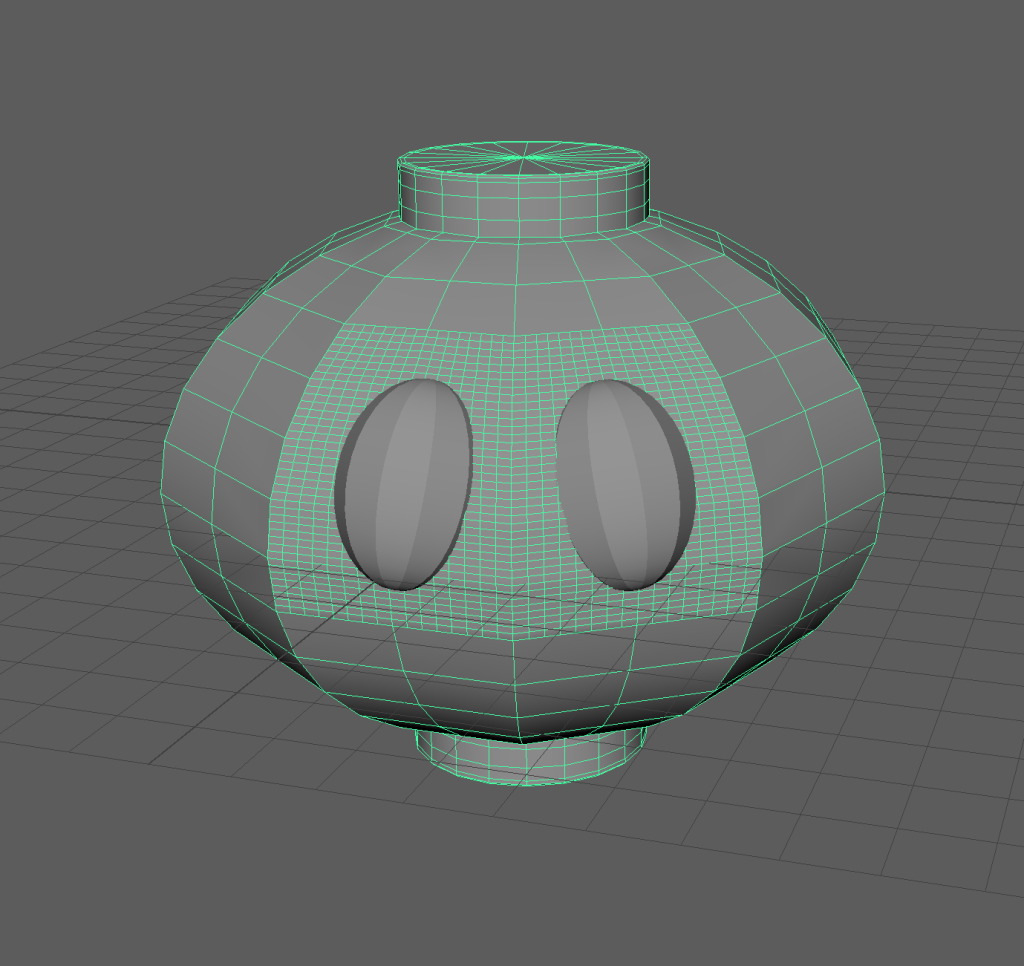
To start I made the centre sphere again, reducing the polies to give it the shape I wanted. I then added 2 small cylinders instead of the original 1 with the centre cut out. This time they the same number of side faces as the sphere so that they matched up better with the body when it came to fusing them instead of creating a chain reaction of ngons. I Boolean Unioned them and did some minor fixes around the top and bottom with the Multi Cut tool. I then added supporting edge loops next to each of the main edges so that when softened it maintained its shape better. I reduced the poly count of the new eye spheres so that they would create a more manageable amount of ngons around them. I then removed them with the same command as before.
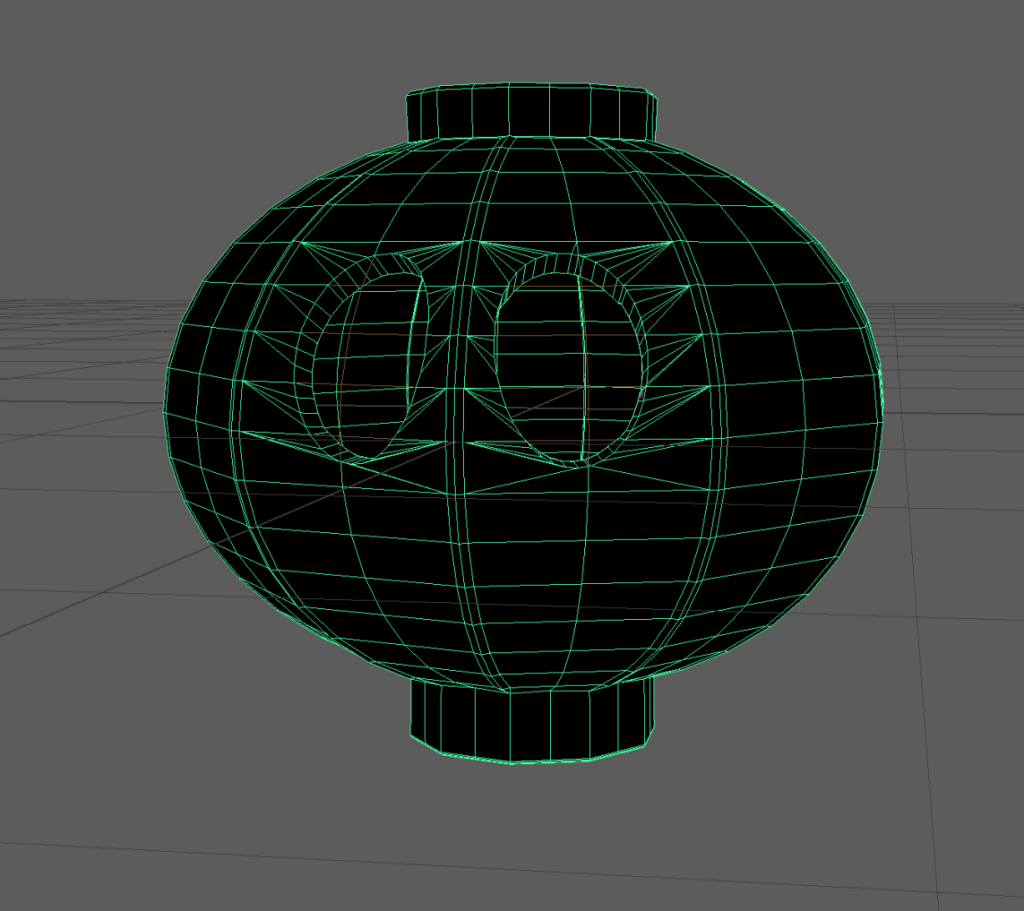
To fix the ngons created by the eye removal, I simply used the Multi Cut tool to bring them into the corners of the main faces. Not the neatest but it worked fine. I then highlighted the main edges and scaled them ever so slightly outward to give them a little bit more prominence. I also re-beveled the top and bottom edges.
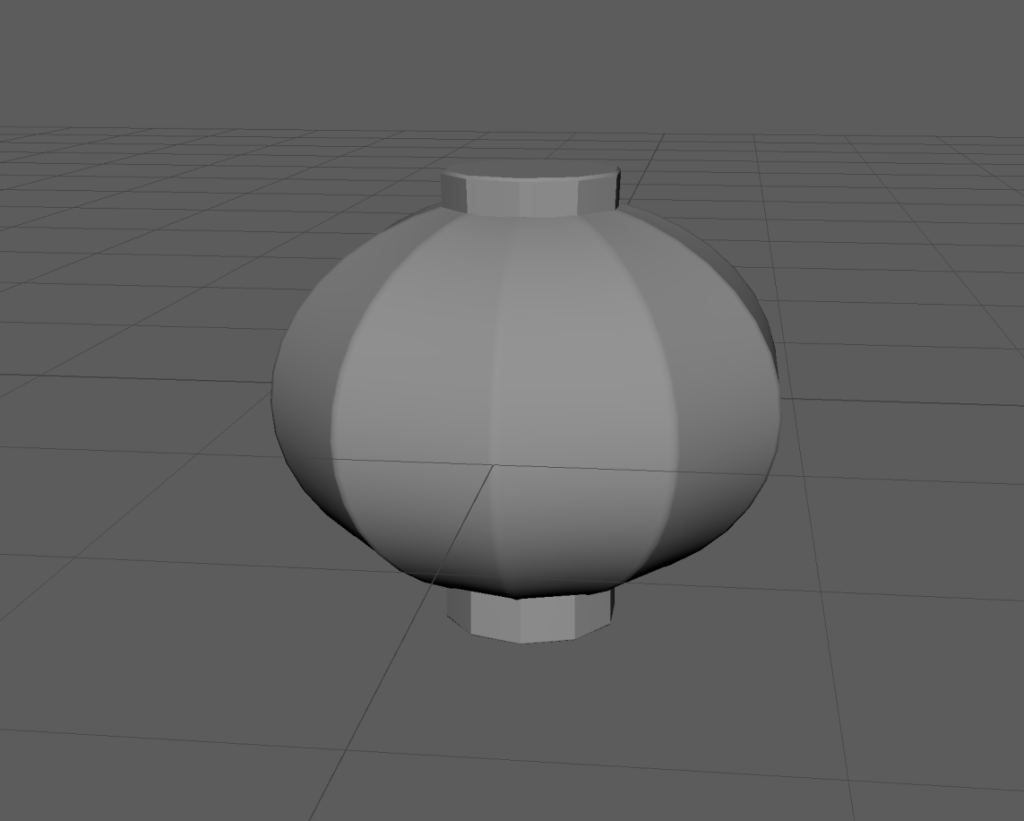
I then extruded the whole thing outwards, but that broke it because of some funky edges connecting the cylinders to the sphere, so I had to extrude it inwards, essentially flipping it inside out, which I didn’t realise until later and just thought I’d broken something that wasn’t stopping me from progressing so I would just fix it later.
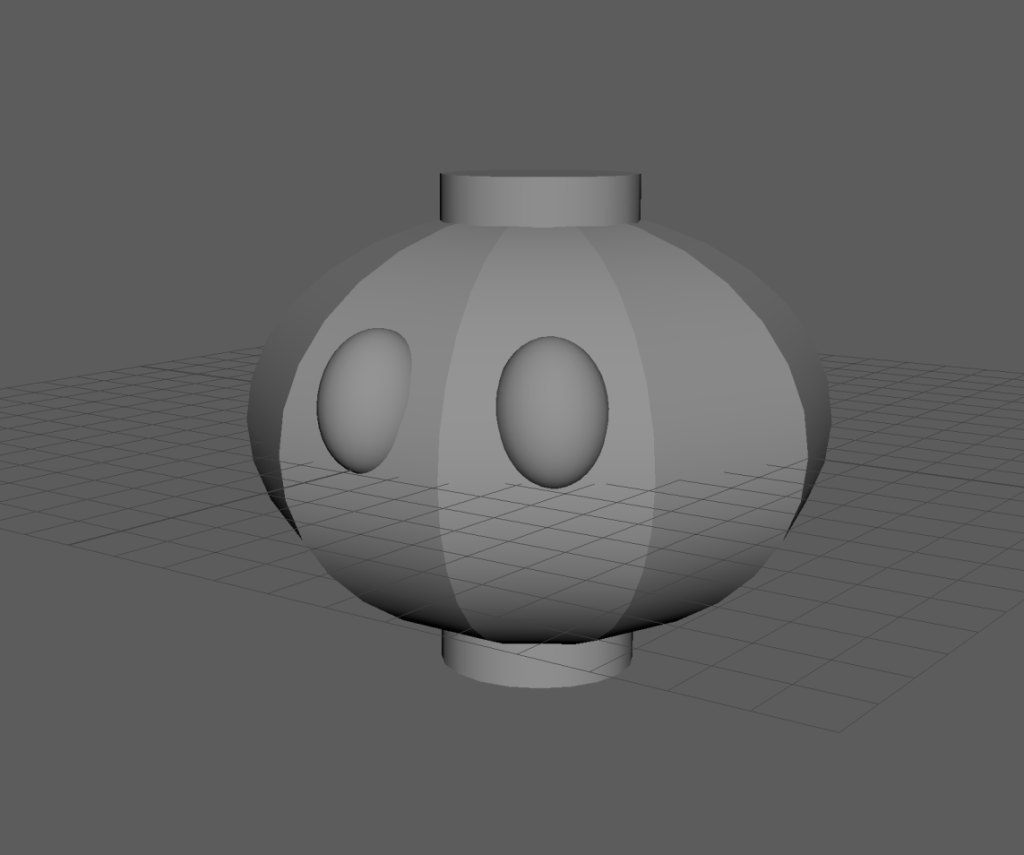
I then highlighted all vertices that connected the cylinders to the sphere and scaled them outwards, due to them all being around the shape differently, this didn’t move them and just levelled them out from being jaggedy.
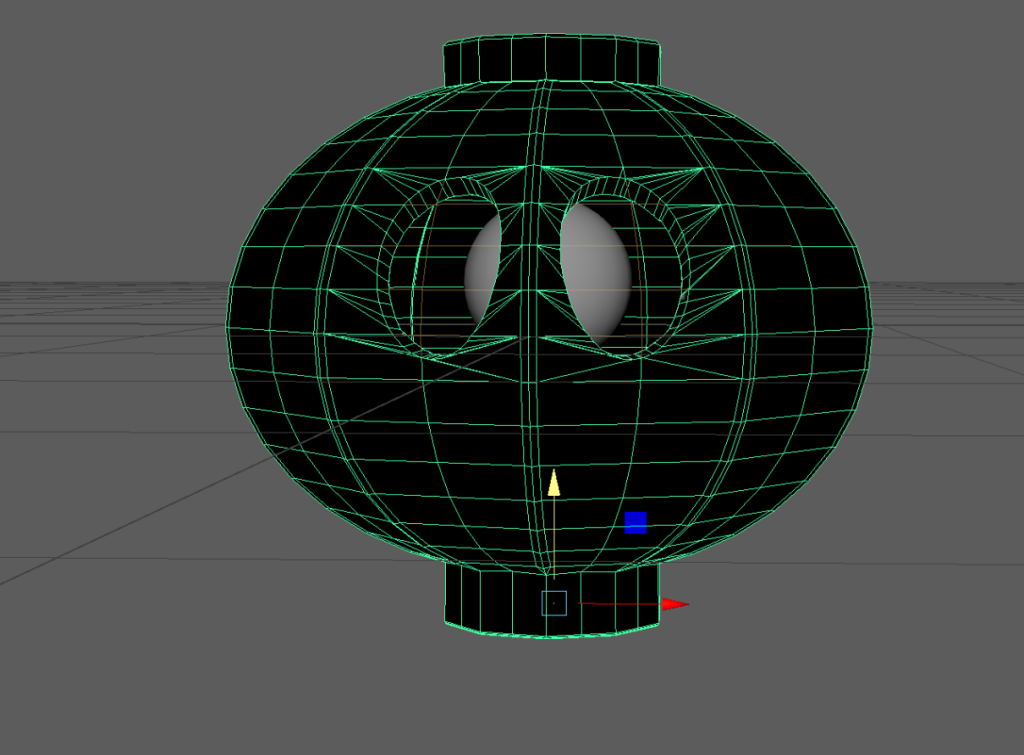
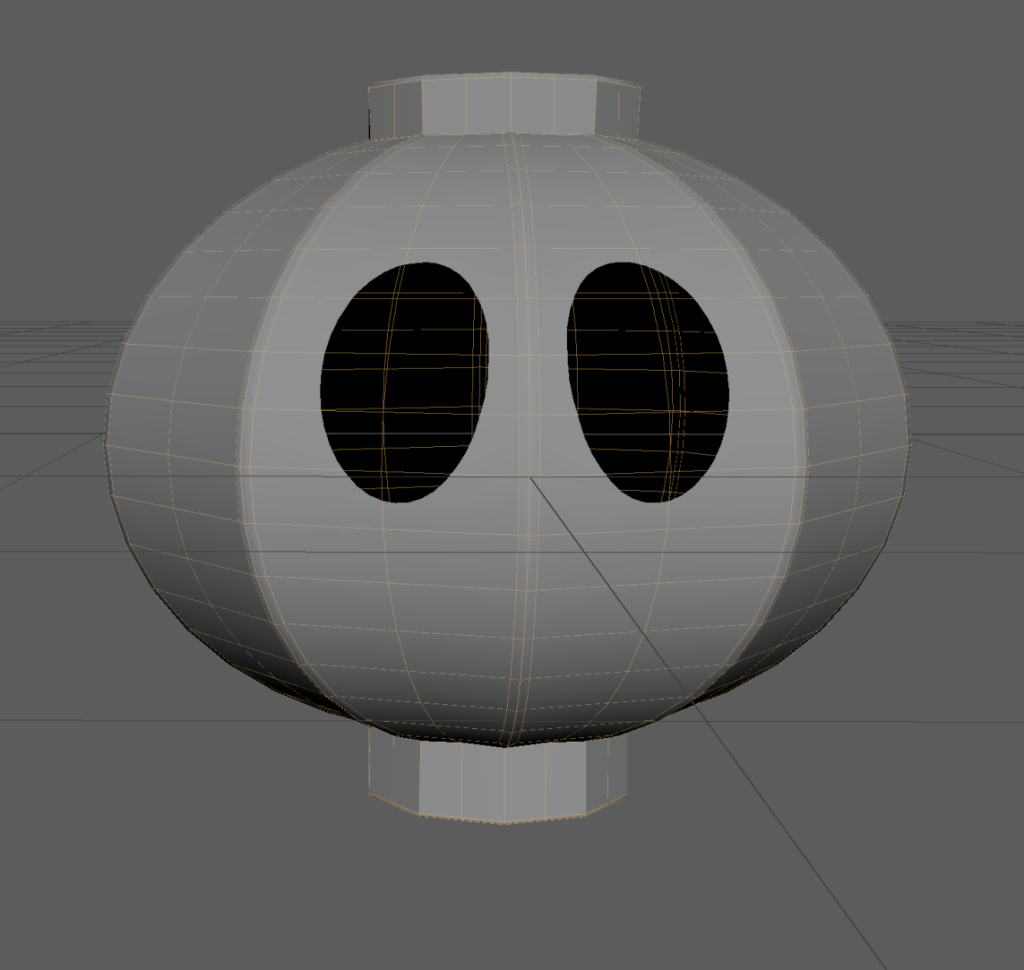
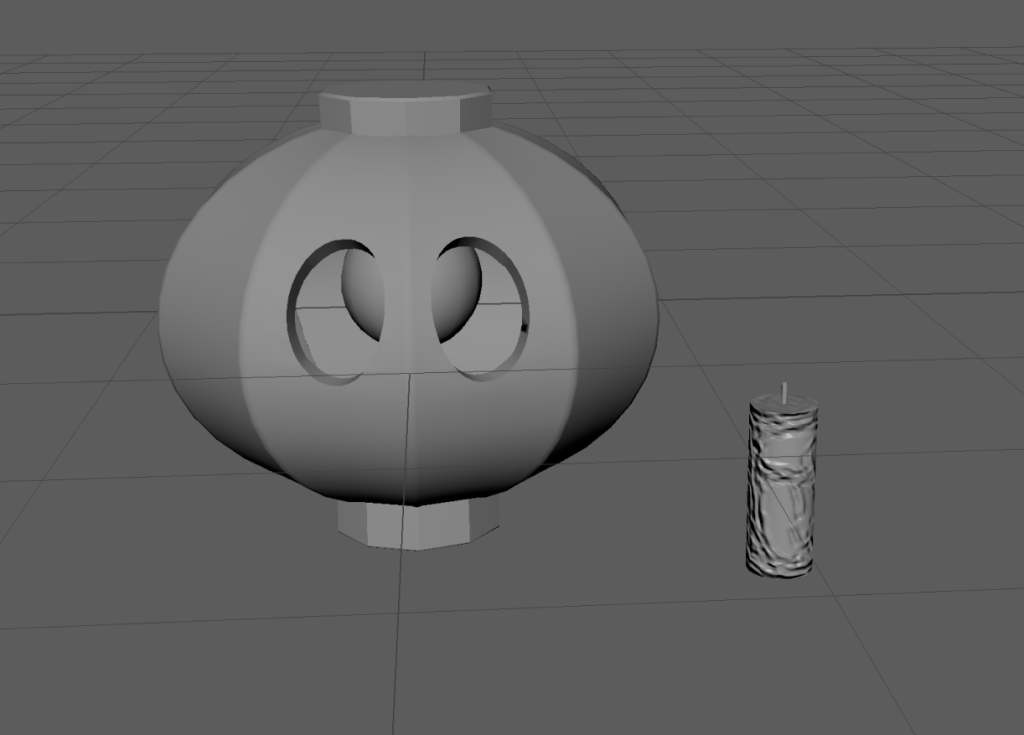
I then added the pupil then fiddled with the size and positioning. I then used Mesh Display Reverse to invert the lambert material so that it was uniform again. This meant that the lantern’s modelling was finished and it was ready for texturing.
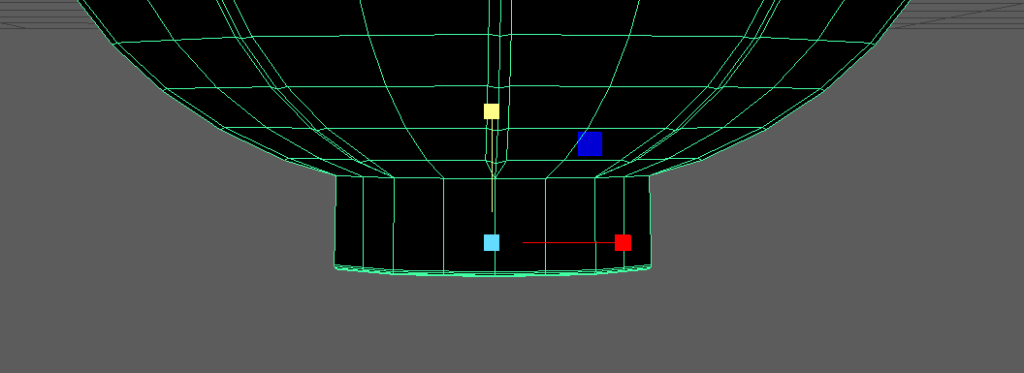
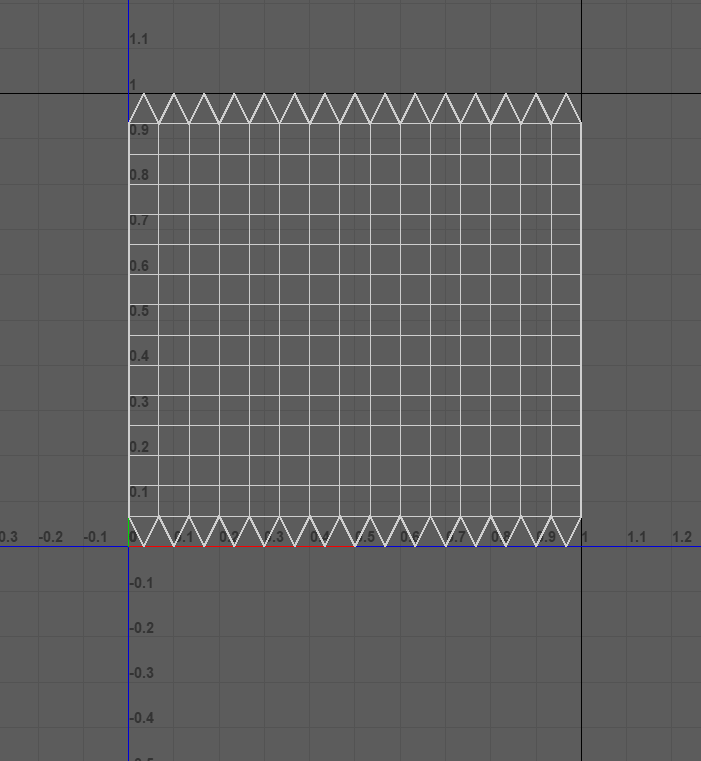
Next was to make the candles. I began with a simple cylinder and then shrunk it down to the right size to compare to the lantern.
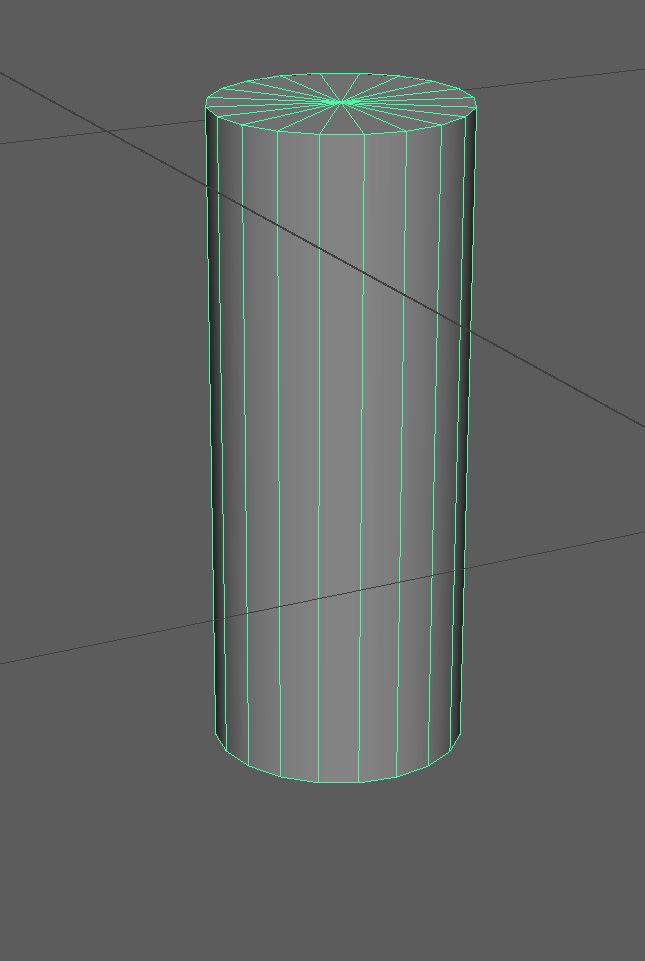
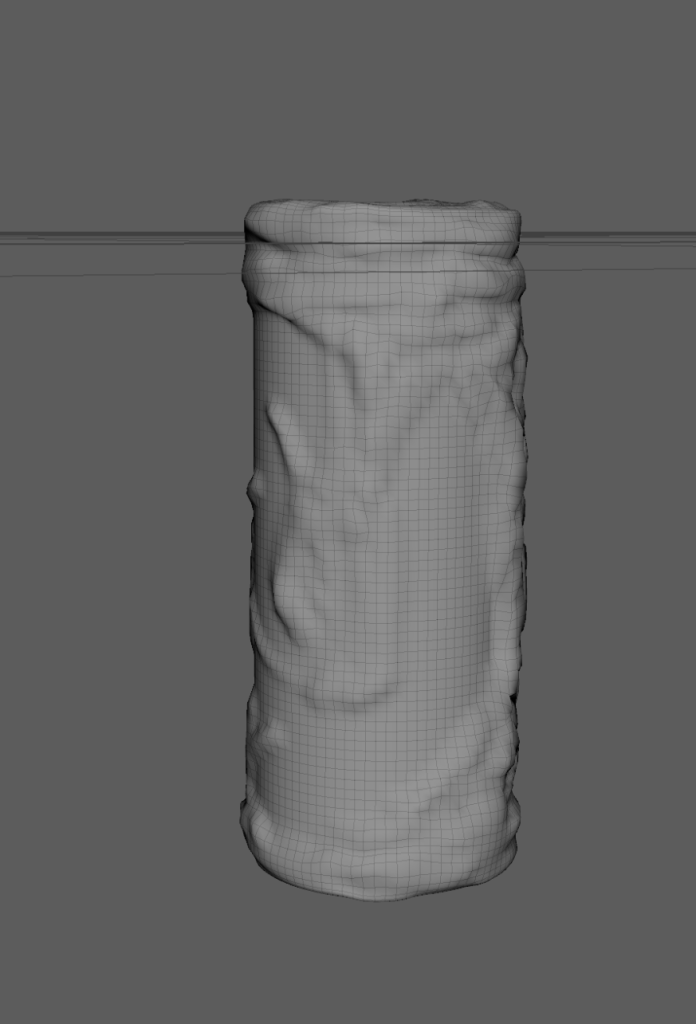
I then used the modelling tool to give the candle a texture that could be painted so that it gave the impression of a candle that had been overgrown by tree bark due to the spirit’s influence. This created the very high poly model that I would then bake into a texture so that I could maintain the effect of high poly assets, while keeping my polies to a reasonable number.
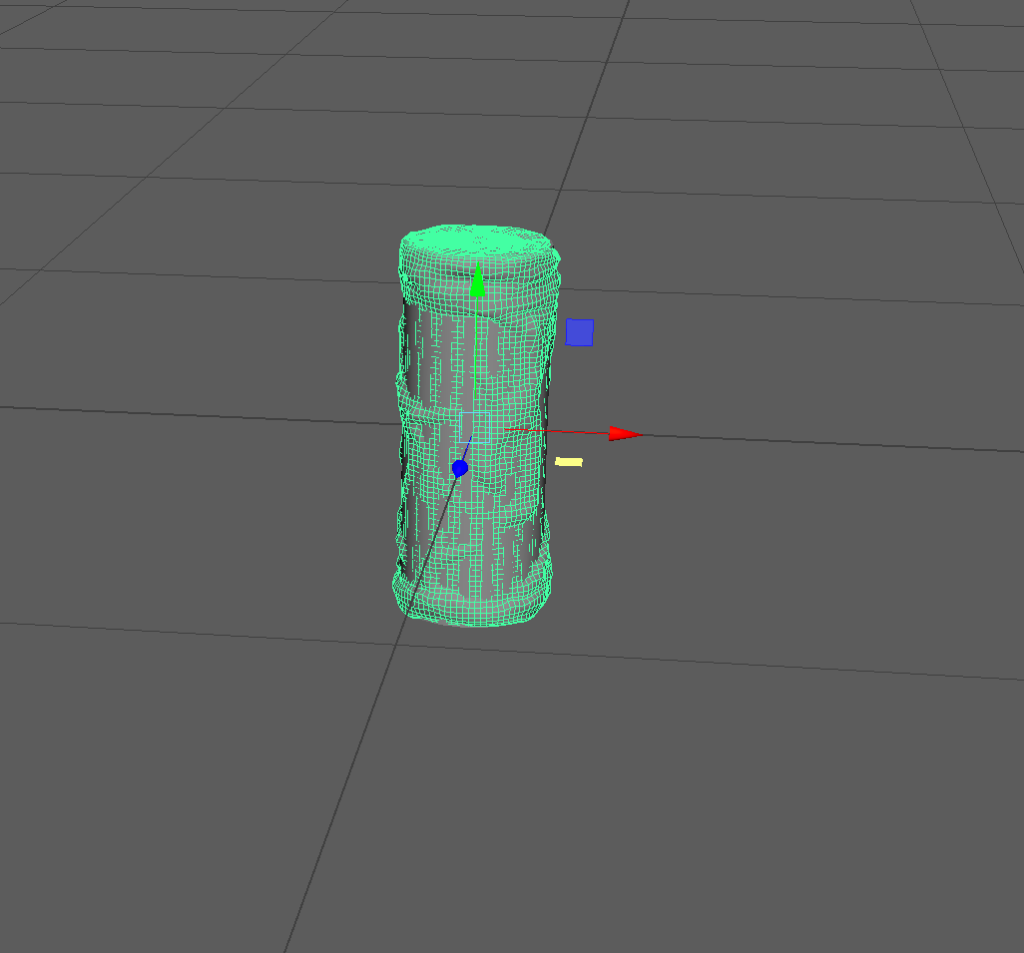
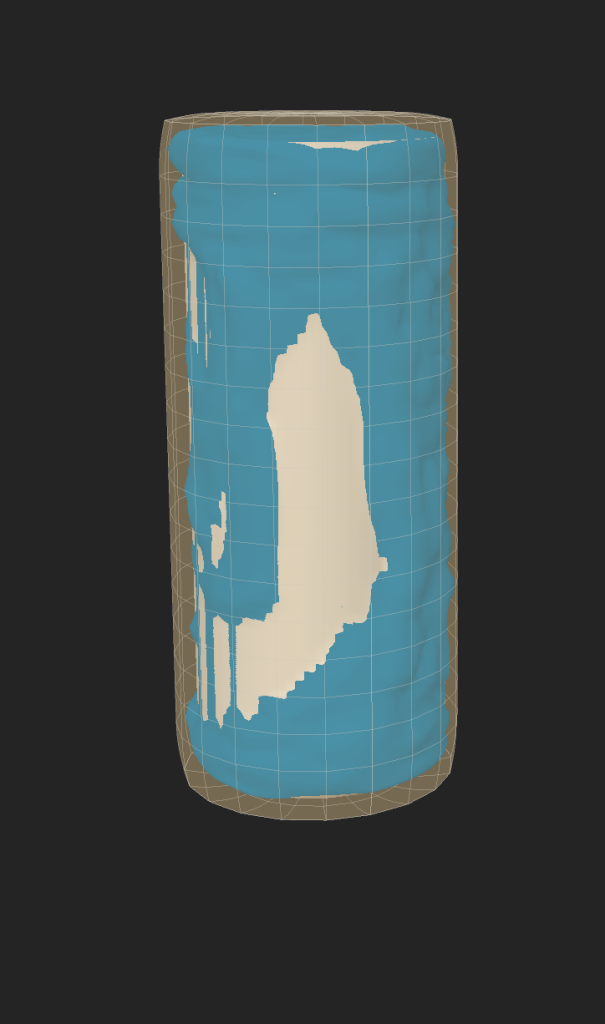
I then exported the basic cylinder as the low poly bake and the modelled cylinder as the high poly bake into Substance Painter to make the high poly texture bake. I then baked only the normal map, ignoring materials and colours for now, focusing specifically o the modelling. I then imported the texture back from Substance Painter back into Maya and applying it to the empty cylinders. I then duplicated, arranged, and deleted the Boolean history before realising that having 5 candles would make exporting back into substance painter very awkward, so I went back to the single candle for now.

Now that the asset was all prepped, it was time for UV Mapping.
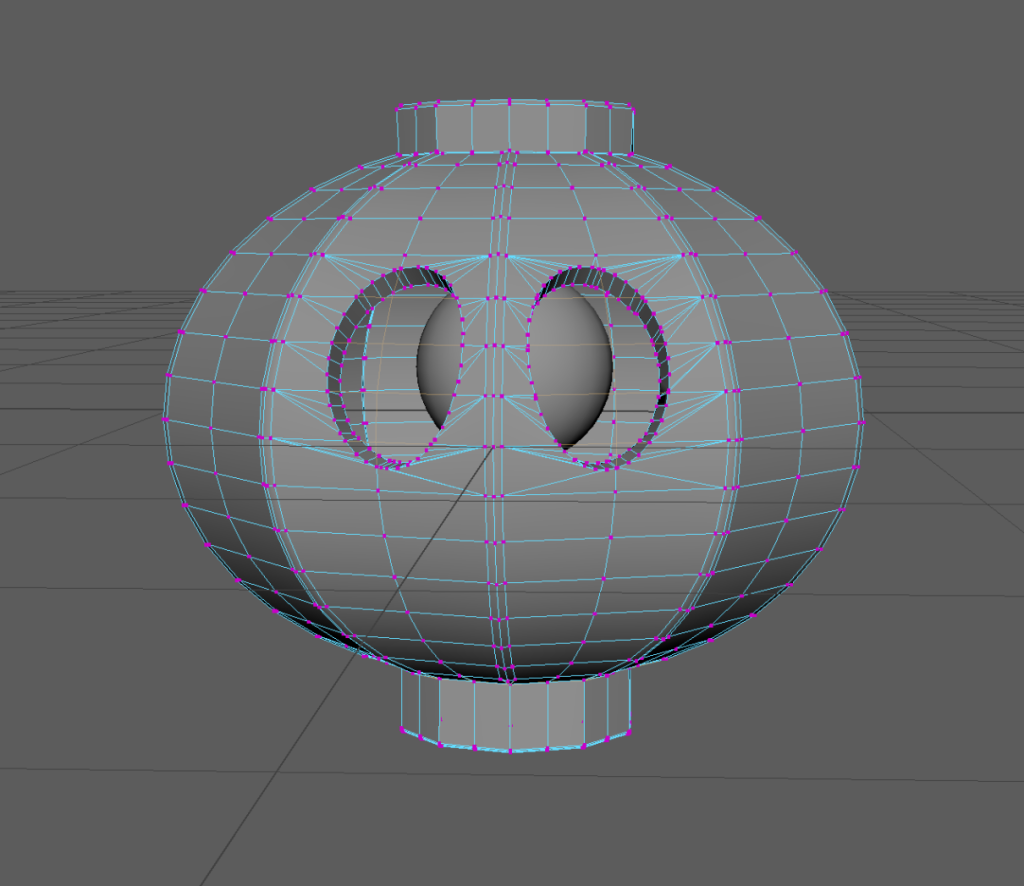
Here are the Orthographic Views:
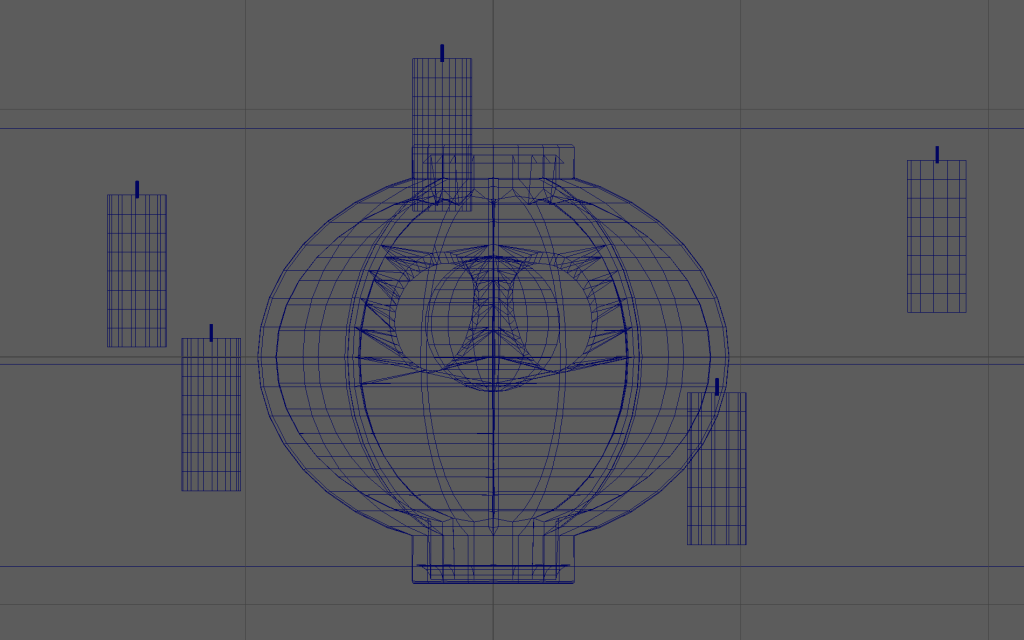
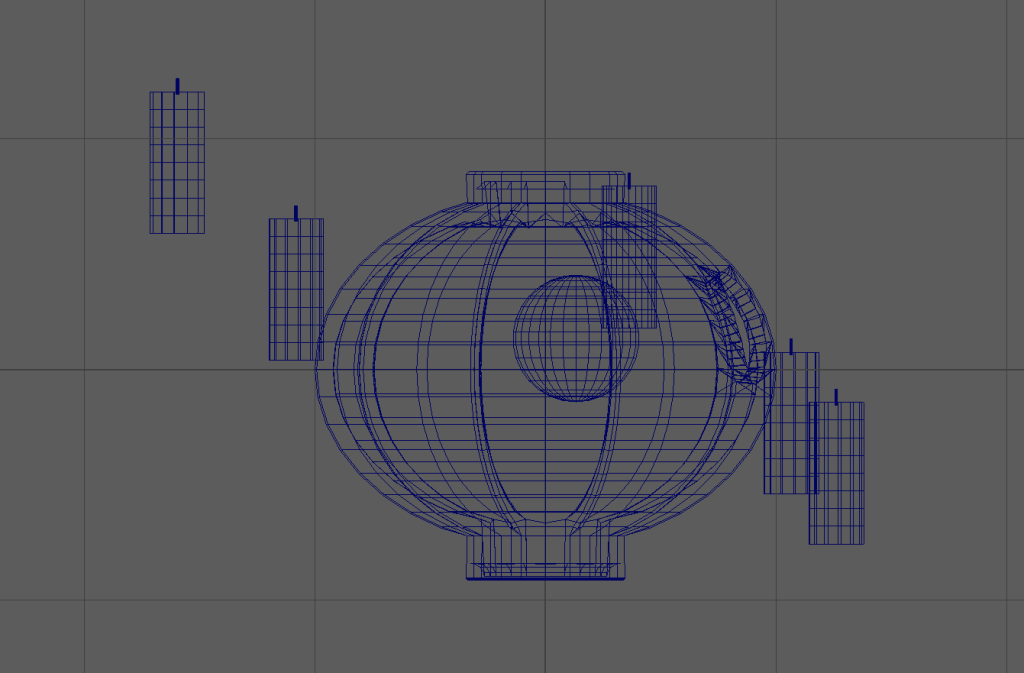
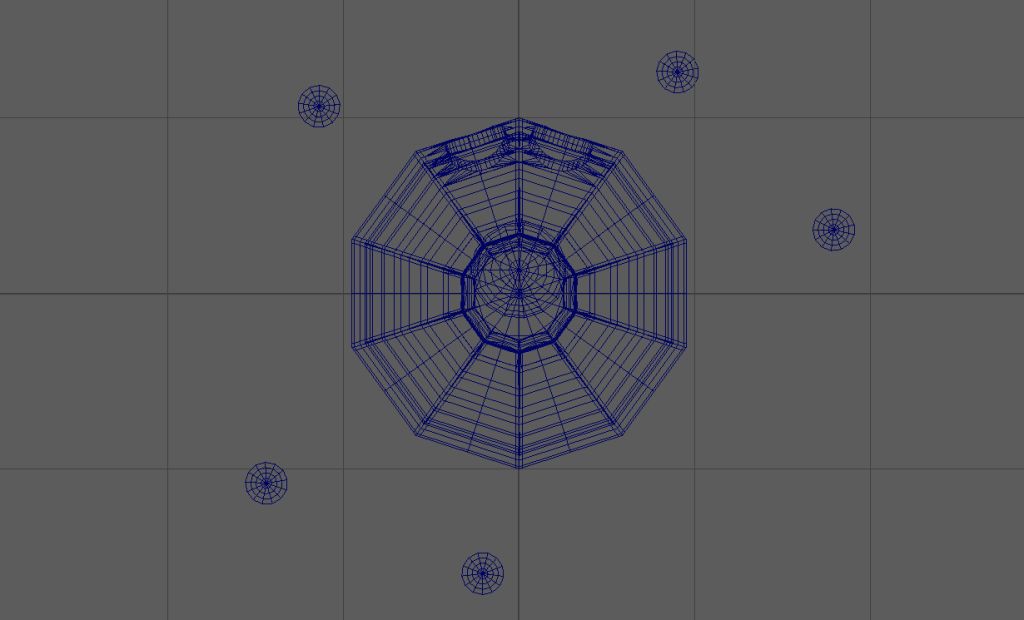
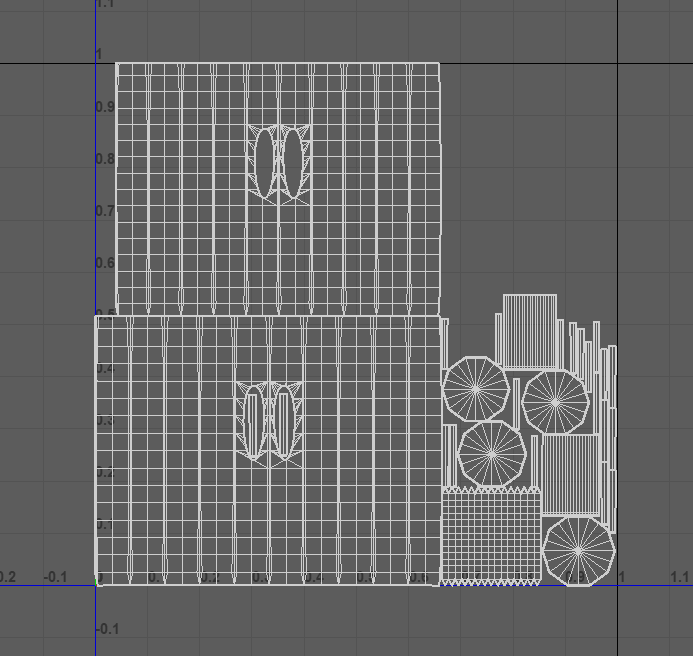
UV Mapping
After modelling, I split my model into 3 main parts for UV mapping, being the lantern, the eye, and the candle. To start, I unwrapped the candle, its wick, and then the eyeball, using the Auto Unwrap tool.
I then moved onto the lantern but decided to include the eyeball so that they could be textured together in Substance Painter. I used Auto Unwrap to unwrap and arrange the lantern and eyeball together.
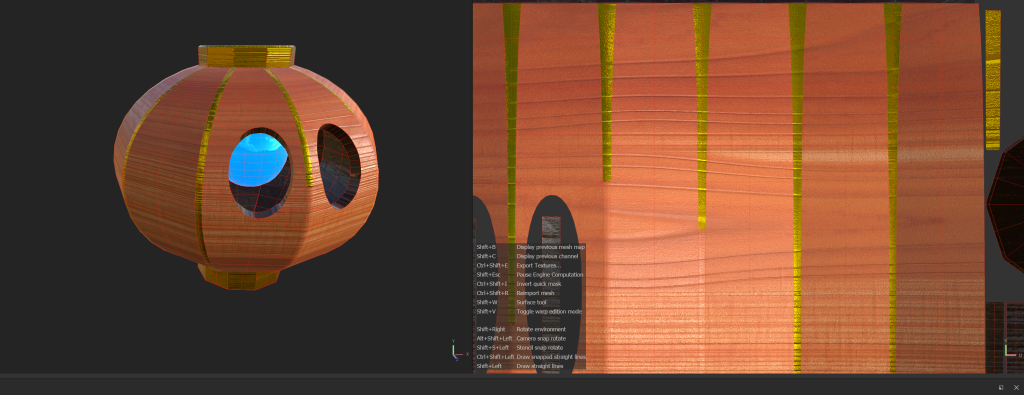
Texturing
After exporting from Maya into Substance, I then used mini exports of my shapes in Maya to bake ID maps onto the asset in Substance to make the texturing process easier.
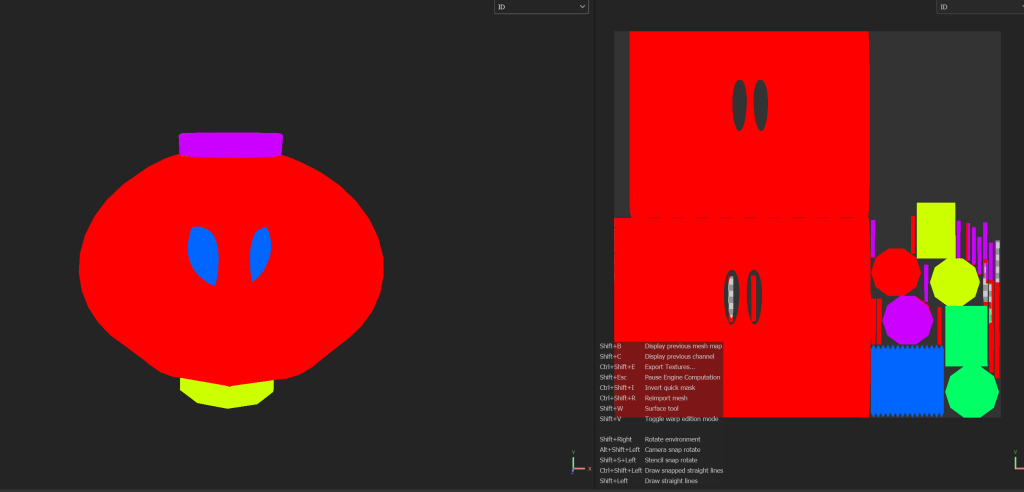
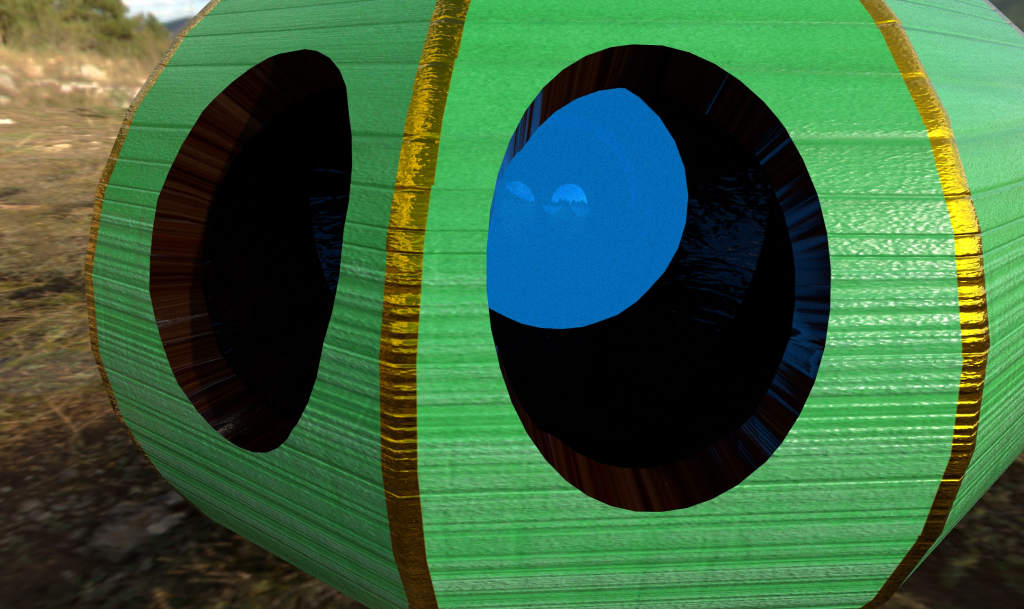
The first part I started texturing was the eyeball, so I started with one of the default glossy textures and a black mask to make application easier, before changing the colour, roughness, and metallicness, and adding a setting for opacity and later emissive setting to give it the impression of being a kind of cloud of blue similar to that of Duskull’s eye from earlier. However, something to do with the current shaders in use blocked the opacity setting from being able to be used, so I had to edit the design to give it a very shiny look so that the emissiveness could still give it the glow I wanted.
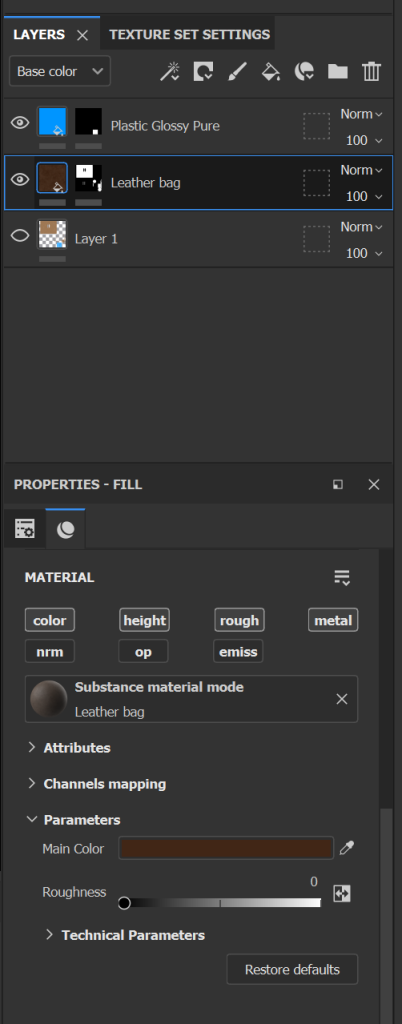
I then added a leather texture to the inside of the lantern. This was to give the effect of having a darker material that could reasonably be shinier and darker than the wood that would be put on the outer surface. For this the process was pretty easy, only changing the colour and roughness to get the look I was after.
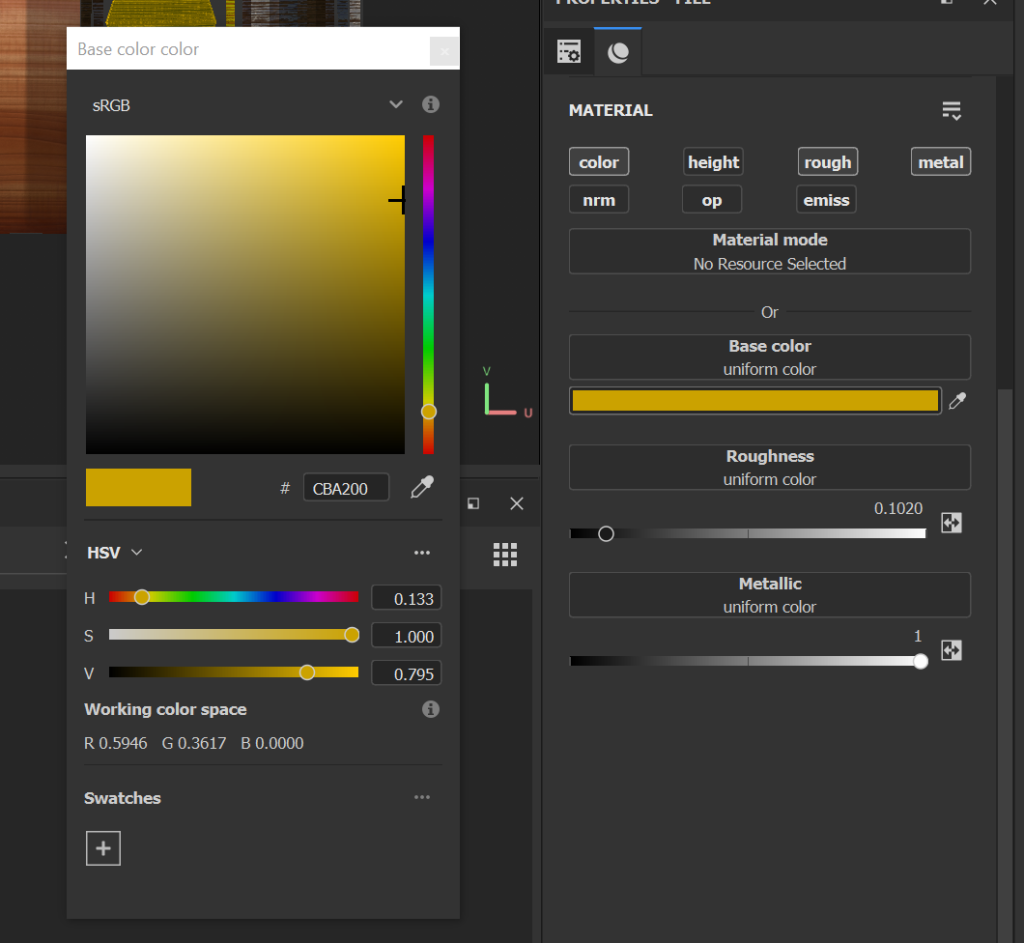
The next thing to do was to add the wooden texture to the outside and add any colouring I wanted. For this I took a wood texture that was similar to that of floor tiles rather than that of a tree with a bit of a more polished pattern. I then added a gold metal texture to the top and bottom cylinder bits. I did this on top of the wooden texture to hopefully give the effect of it being painted with shiny gold paint rather than being truly made of gold.
At this point the asset looked like this.
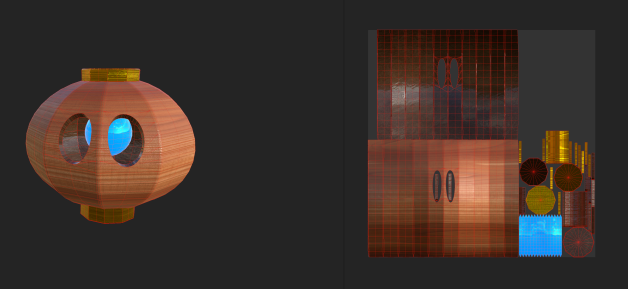
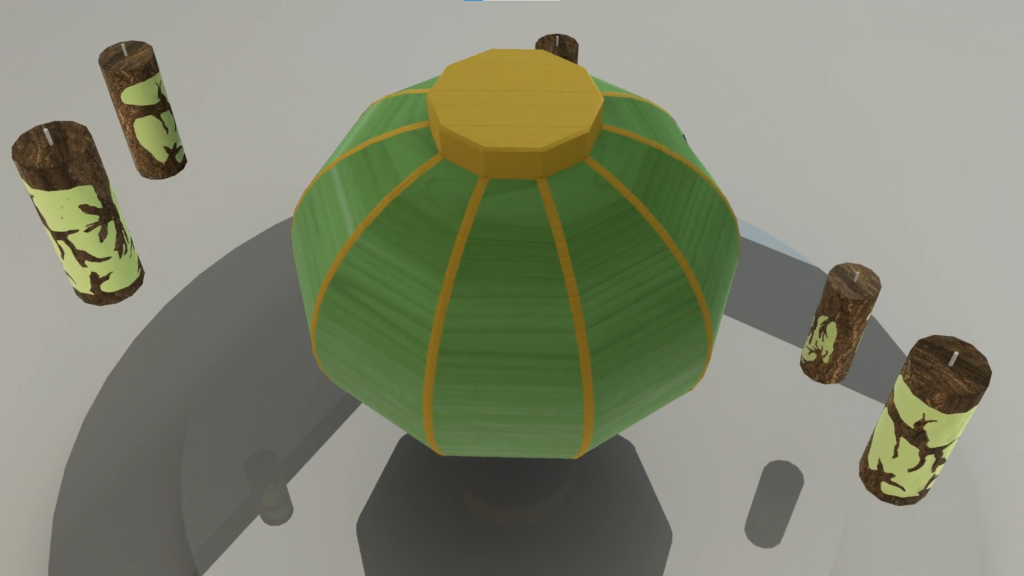
I still wasnt very happy with how it looked so I went back to my references and remembered the vertical gold lines that are featured on the edges of these lanterns normally. So I went back to the gold material and added those sections in.
After a while of playing with wood colours as the colour of the main body had yet to be decided, I decided a light green body would fit well with the light blue eye and the greenish tint to the candles I’d planned.
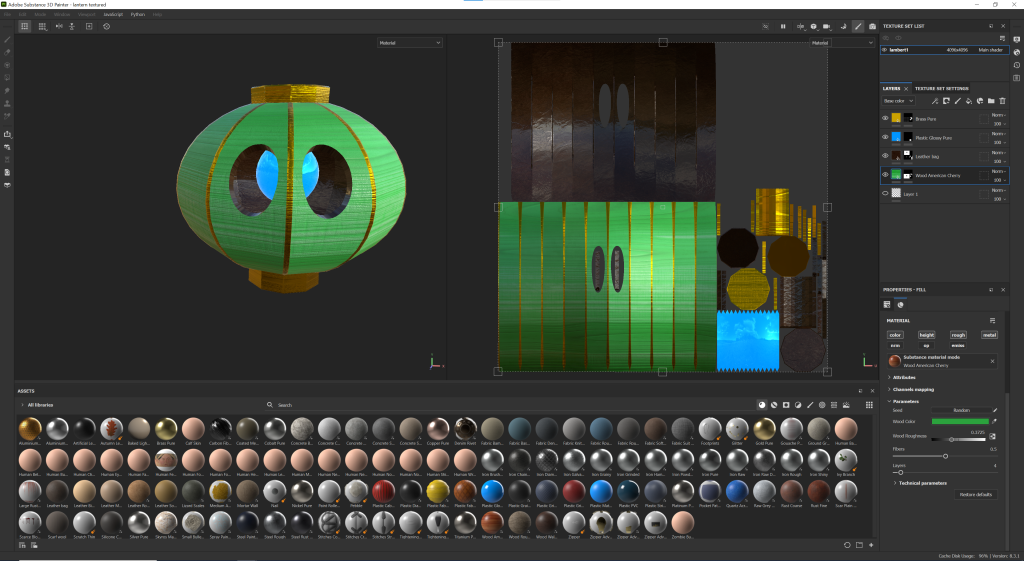
There were some minor adjustments in roughness and metalicness across the board to fix some things up but this was the final lantern texture that I exported back to Maya.
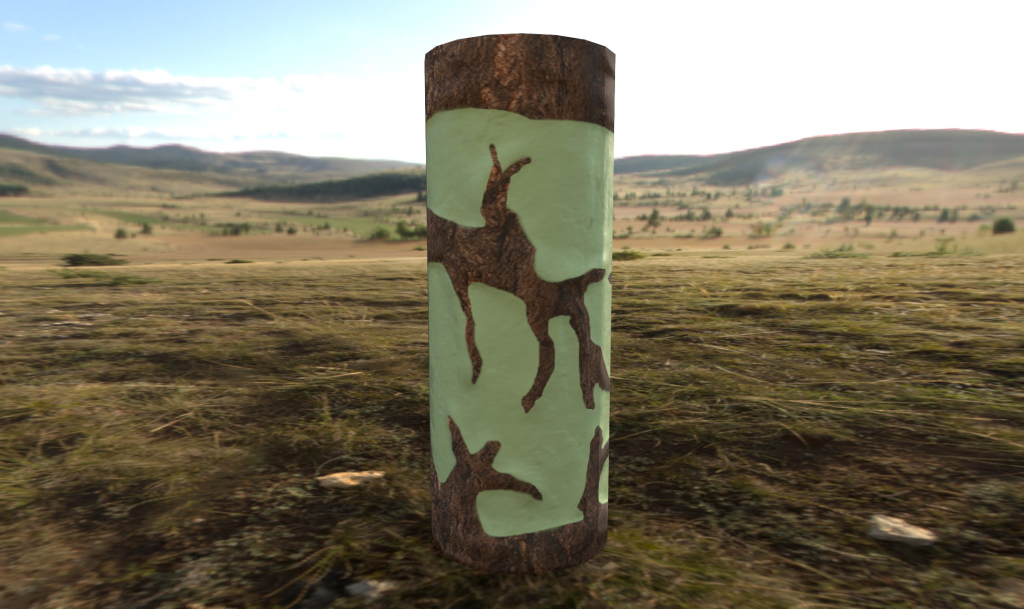
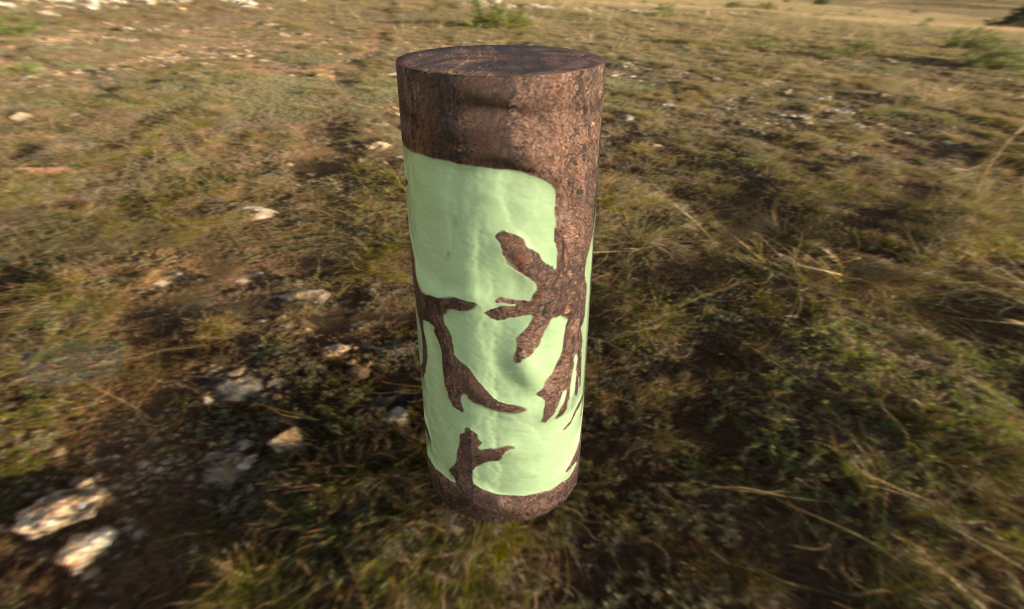
I then moved onto the candle but forgot to take any screenshots so I’m going to use some of the beauty shots at the end of the description. With this I applied a base, papery texture to the candle to give it a similar look to a worn out candle, making it slightly off white to give a sense to its age but also to lightly match the body of the lantern.
I then added a bark texture and black mask, and painted the bark onto the depth pattern I’d made before, giving it both material and texture as it gave the impression the bark was growing over the candles.

With this both textures were ready to go back onto my model in Maya. With this, the emissive textures refused to export, meaning the glow of the eye would have to be done in lighting.
Making the Final Product
I started with applying the textures, duplicating the candles, and arranging. I was able to have more candles than the originally planned 3 due to being careful with poly use through high poly baking and not doing tonnes of unnecessary poly divisions around the eyes.
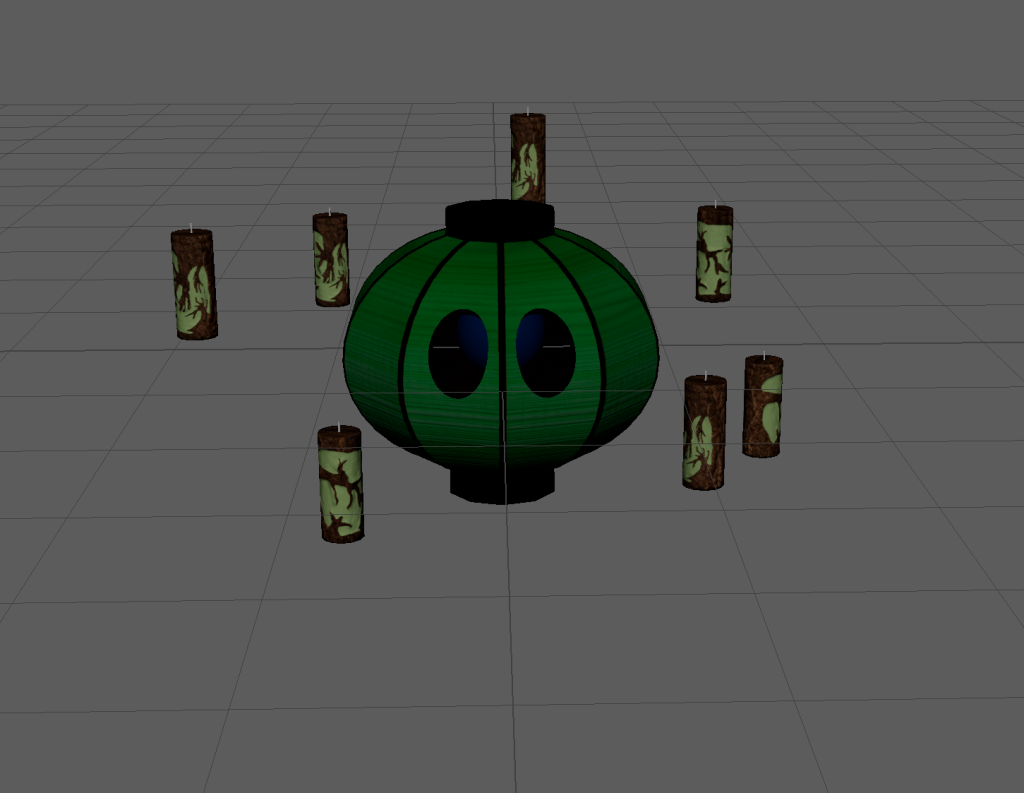
I ended up with 7 but thought it looked a bit crowded and didnt have the effect I was after, so I reduced it to 5.
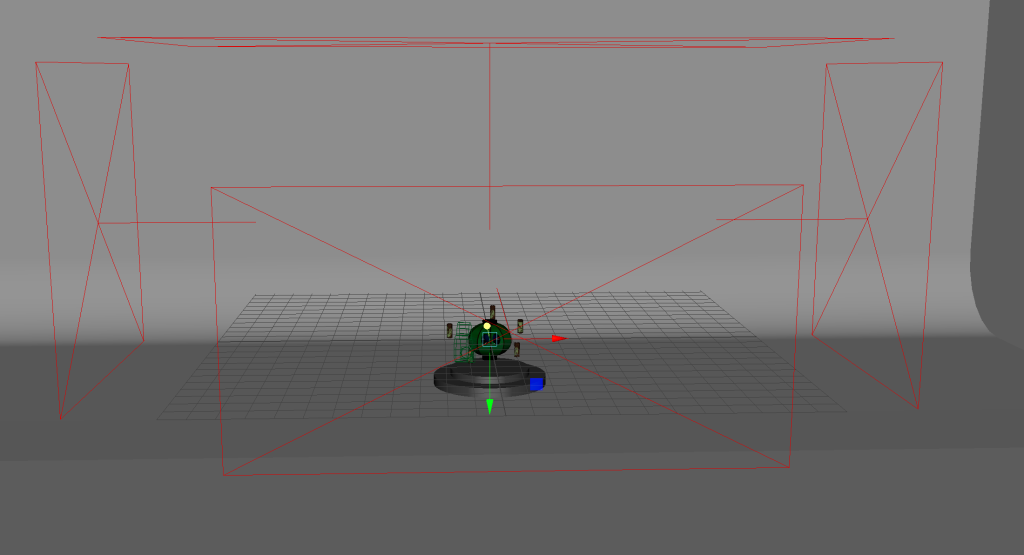
Next was to sort the beauty shots and show reel. For this I added a camera and a simple stage made by adding a plane and extruding the bottom before bevelling.
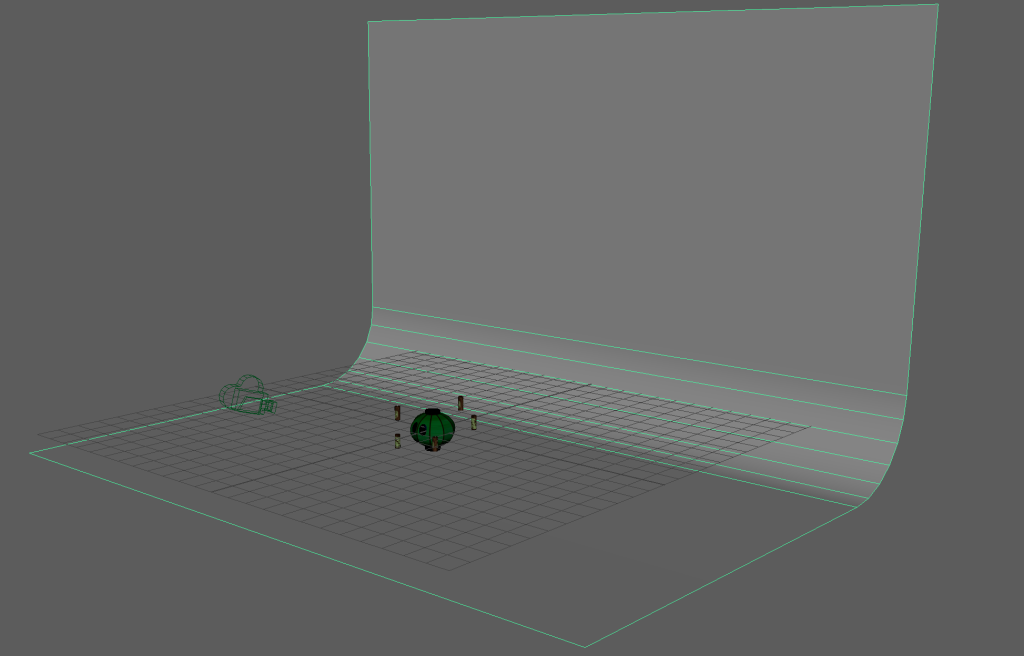
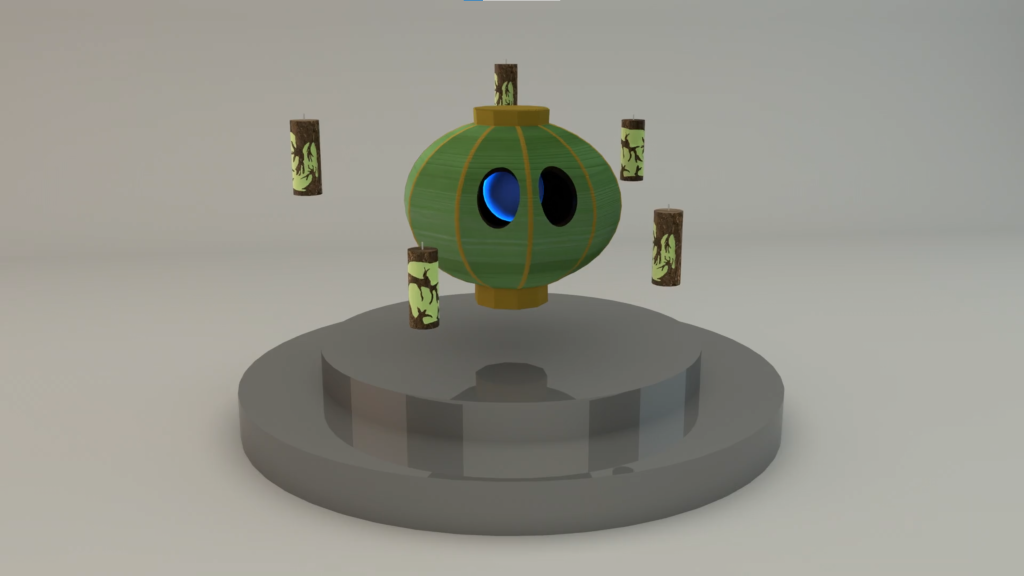
I then added a little stage for it to float above, making it reflective to give a nicer effect, as well as area lights surrounding the asset, making sure to turn off normalise as otherwise it breaks everything.
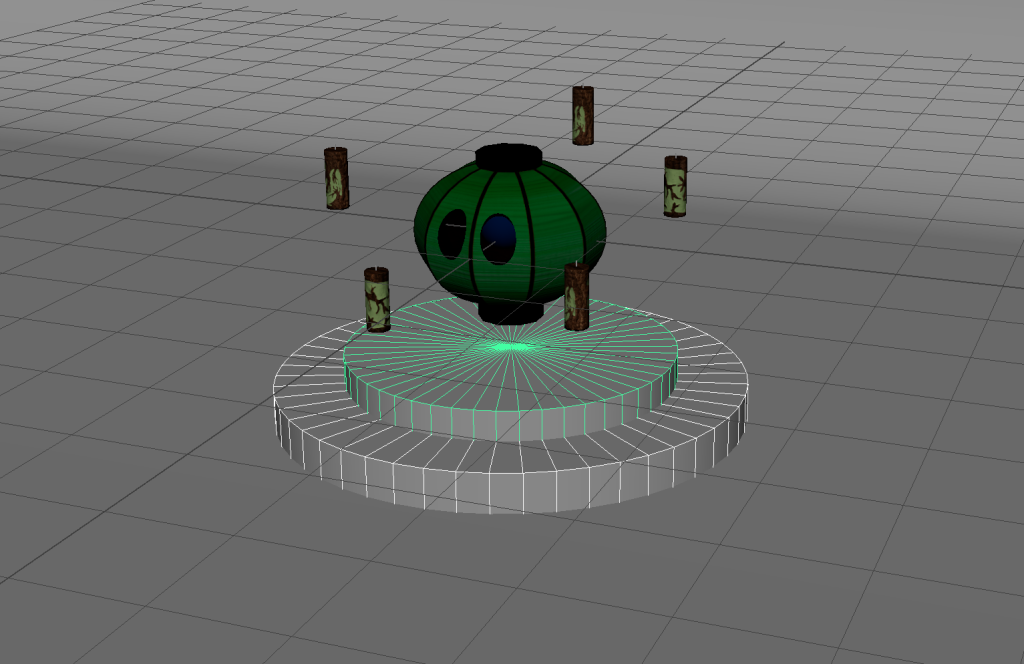
Next was to sort out the eyeball. To do this I added a small area light inside the lantern behind the eyeball, giving it an even better effect than it would have had if the emissive and opacity textures had worked, as it had the correct brightness to dark blur thing due to the back lighting, which I was really pleased about. With that being sorted only animating and beauty shots were left.
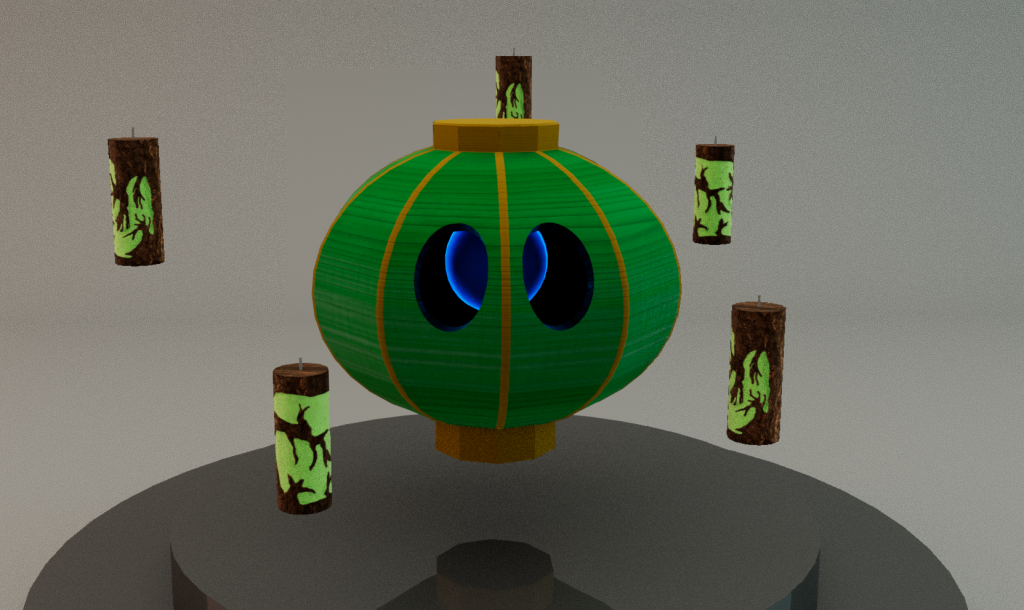
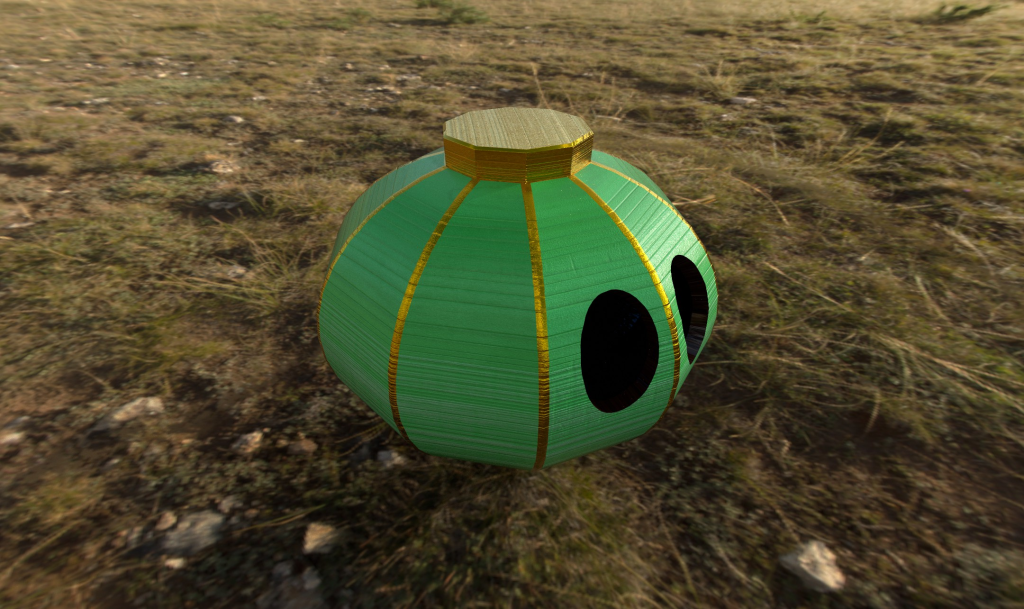
Beauty Shots and Show Reel
References
Ninchanese (21/04/2016) How to Make Your Chinese Lantern, available online: https://ninchanese.com/blog/2016/04/21/chinese-lantern/ [accessed 29/04/2023]
Unknown (n.d.) Chandelure Character Profile, available online: https://unite.pokemon.com/en-us/pokemon/chandelure/ [accessed 29/04/2023]
Unknown (n.d.) Duskull Pokédex, available online: https://www.pokemon.com/uk/pokedex/duskull [accessed 29/04/2023]